

Table of Contents
1. Introduction: The Power of DIY Hair Masks for Deep Conditioning
DIY hair masks have become a game-changer in the world of hair care, offering a natural and cost-effective way to achieve salon-quality results at home. These homemade treatments are not just a passing trend; they’re a powerful tool for deep conditioning and revitalizing your locks. In this comprehensive guide, we’ll explore 16 luxurious DIY hair masks that will unlock your hair’s hidden potential.
Deep conditioning is essential for maintaining healthy, vibrant hair, and DIY hair masks provide a customizable solution for every hair type and concern. Whether you’re battling dryness, frizz, or damage, there’s a DIY hair mask recipe waiting to transform your tresses. By harnessing the power of natural ingredients, these homemade treatments offer a gentle yet effective alternative to commercial products, often delivering superior results.
Get ready to discover the secrets of creating and using DIY hair masks that will revolutionize your hair care routine.
2. Understanding Deep Conditioning and Its Benefits
Deep conditioning is a crucial step in any hair care regimen, and DIY hair masks are an excellent way to achieve this nourishing treatment. Unlike regular conditioners, deep conditioning penetrates the hair shaft, providing intense moisture and nutrients that can dramatically improve your hair’s health and appearance.
The benefits of using DIY hair masks for deep conditioning are numerous:
1. Improved moisture retention
2. Enhanced elasticity and strength
3. Reduced breakage and split ends
4. Increased shine and smoothness
5. Better manageability and styling ease
DIY hair masks offer several advantages over store-bought products. Firstly, you have complete control over the ingredients, allowing you to tailor the mask to your specific hair needs. This customization is particularly beneficial for those with sensitive scalps or allergies. Secondly, homemade masks are often more cost-effective and eco-friendly, as they eliminate the need for packaging and artificial preservatives.
Moreover, DIY hair masks typically contain higher concentrations of active ingredients compared to commercial products, which often include fillers and synthetic compounds. This means you’re getting a more potent treatment with each application. By regularly incorporating DIY hair masks into your routine, you’ll notice a significant improvement in your hair’s overall health, texture, and appearance.
3. Choosing the Right DIY Hair Mask for Your Hair Type
Selecting the perfect DIY hair mask begins with understanding your hair type and specific concerns. Different ingredients cater to various hair needs, so it’s essential to choose wisely for optimal results.
For dry hair, look for DIY hair masks rich in moisturizing ingredients like avocado, honey, or coconut oil. If you have oily hair, clay-based masks or those containing apple cider vinegar can help balance sebum production. For damaged or chemically treated hair, protein-rich DIY hair masks with ingredients like eggs or yogurt can help strengthen and repair.
Consider your hair’s porosity as well. Low porosity hair benefits from lighter, easily absorbed ingredients, while high porosity hair needs heavier oils and butter for deep nourishment. Curly hair often requires extra moisture, so DIY hair masks with shea butter or aloe vera are excellent choices.
By matching your DIY hair mask ingredients to your specific hair type and concerns, you’ll maximize the benefits of your deep conditioning treatments.
4. Essential Ingredients for Effective DIY Hair Masks
Creating powerful DIY hair masks starts with selecting the right ingredients. Here are some essential components that can elevate your homemade deep conditioning treatments:
Natural Oils:
Coconut oil: Penetrates the hair shaft, providing deep moisture
Argan oil: is rich in antioxidants and vitamin E for hair strength
Jojoba oil: Closely mimics natural scalp sebum, balancing oil production
Proteins:
Eggs: Packed with protein and biotin for hair growth and strength
Greek yogurt: Contains lactic acid to cleanse the scalp and protein for strength
Keratin: Helps repair damaged hair and improve elasticity
Moisturizing Agents:
Honey: A natural humectant that attracts and retains moisture
Aloe vera: Soothes the scalp and provides hydration
Avocado: Rich in healthy fats and vitamins for deep nourishment
Herbs and Plant-Based Ingredients:
Rosemary: Stimulates hair growth and improves scalp health
Chamomile: Soothes the scalp and adds shine to hair
Hibiscus: Rich in vitamin C and amino acids for hair strength
By combining these ingredients in your DIY hair masks, you can create potent formulas tailored to your specific hair needs. Experiment with different combinations to find the perfect blend for your locks, and enjoy the benefits of natural, homemade deep conditioning treatments.
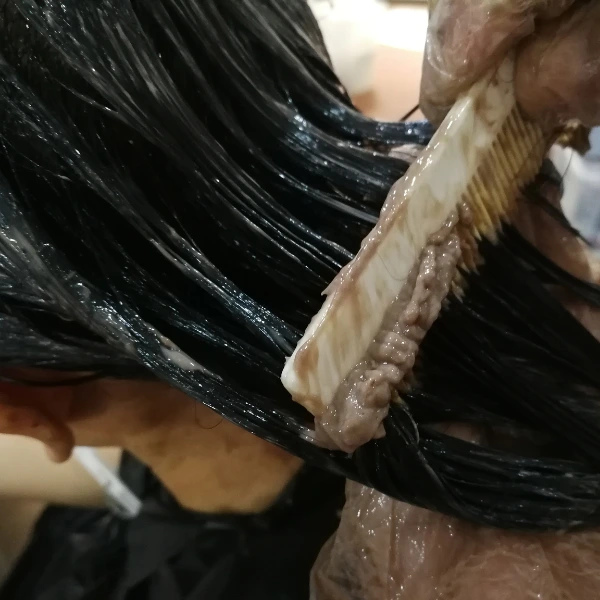
5. 16 Luxurious DIY Hair Masks for Deep Conditioning
Haircare Stock photos by Vecteezy
Now that we’ve covered the basics, let’s dive into the heart of our guide: 16 transformative DIY hair masks for deep conditioning. These recipes are designed to address various hair concerns and types, offering a natural solution for everyone. Remember, the key to success with DIY hair masks is consistency and finding the right combination for your unique hair needs.
1. The Ultimate Moisture Boost Mask
Ingredients:
1 ripe avocado
2 tablespoons honey
– 1 tablespoon coconut oil
This DIY hair mask is perfect for dry, damaged hair. Mash the avocado and mix it with honey and melted coconut oil. Apply to damp hair, focusing on the ends. Leave for 30 minutes before rinsing thoroughly.
2. Protein-Packed Egg Mask
Ingredients:
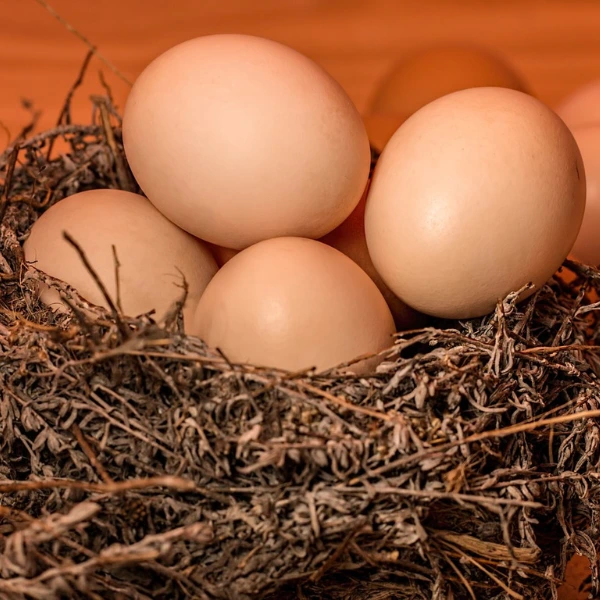
2 whole eggs
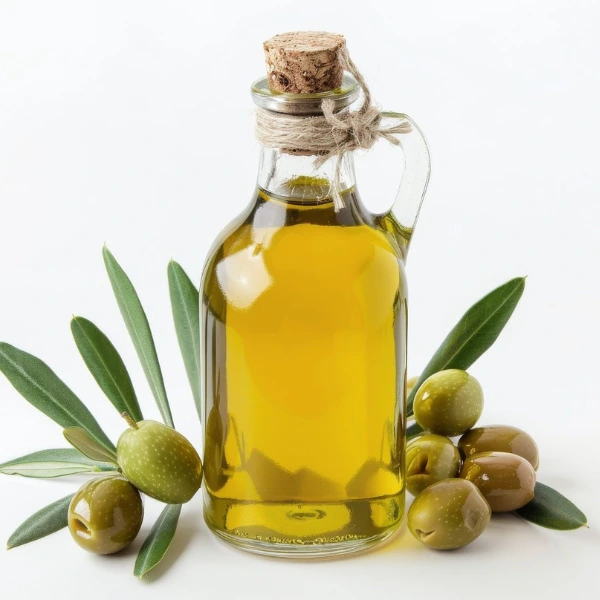
1 tablespoon olive oil
Ideal for strengthening weak or brittle hair, this protein-rich DIY hair mask helps reduce breakage. Whisk the eggs with olive oil, apply to damp hair, and leave for 20 minutes. Rinse with cool water to prevent the eggs from cooking.
3. Banana Smoothie Hair Mask
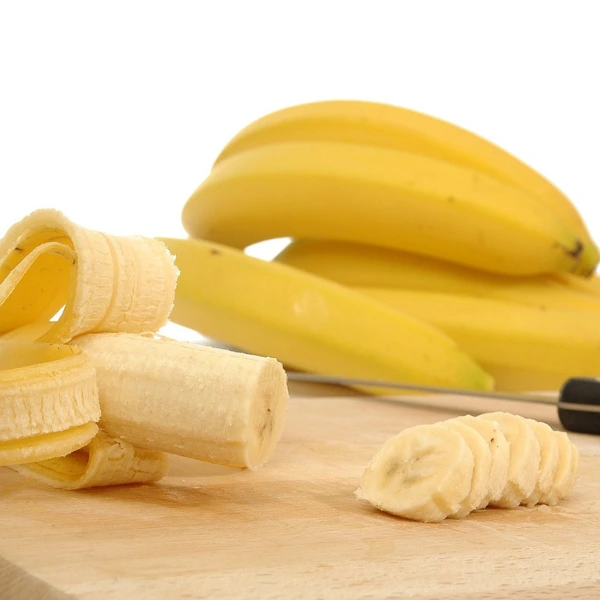
Ingredients:
– 1 ripe banana
– 2 tablespoons yogurt
– 1 tablespoon honey
This nourishing mask is excellent for adding shine and softness. Blend all ingredients until smooth, apply to hair from roots to tips, and leave for 25 minutes before rinsing.
4. Clarifying Apple Cider Vinegar Mask
Ingredients:
– 1/4 cup apple cider vinegar
1/4 cup water
1 tablespoon honey
Perfect for oily hair and scalps, this DIY hair mask helps balance pH levels and remove buildup. Mix ingredients, apply to scalp and hair, leave for 15 minutes, then rinse thoroughly.
5. Soothing Aloe Vera and Coconut Mask
Ingredients:
3 tablespoons aloe vera gel
2 tablespoons coconut oil
This mask is ideal for soothing an irritated scalp while providing deep moisture. Mix ingredients, apply to scalp and hair, massage gently, and leave for 30 minutes before rinsing.
6. Strengthening Greek Yogurt Mask
Ingredients:
1/2 cup Greek yogurt
1 tablespoon honey
5 drops lavender essential oil
This protein-rich DIY hair mask helps strengthen hair and promote growth. Mix ingredients, apply to hair, focusing on the scalp, and leave for 20 minutes before rinsing.
7. Shine-Boosting Beer Mask
Ingredients:
1/2 cup flat beer
1 egg
1 teaspoon jojoba oil
Surprisingly effective, this mask adds incredible shine to dull hair. Mix ingredients, apply to hair, cover with a shower cap, and leave for 20 minutes before rinsing.
8. Hydrating Honey and Olive Oil Mask
Ingredients:
1/4 cup honey
1/4 cup olive oil
This simple yet effective DIY hair mask is perfect for dry, frizzy hair. Warm the mixture slightly, apply to hair, cover with a warm towel, and leave for 30 minutes before rinsing.
9. Scalp-Stimulating Rosemary Mask
Ingredients:
2 tablespoons rosemary-infused oil
1 egg yolk
1 tablespoon honey
Excellent for promoting hair growth and scalp health. Mix ingredients, apply to scalp and hair, massage gently, and leave for 25 minutes before rinsing.
10. Color-Protecting Avocado and Mayonnaise Mask

Avacado Stock photos by Vecteezy
Ingredients:
1/2 ripe avocado
2 tablespoons mayonnaise
1 teaspoon argan oil
This mask helps protect and nourish color-treated hair. Mash avocado and mix with other ingredients, apply to hair, cover with a shower cap, and leave for 30 minutes before rinsing.
11. Frizz-Taming Coconut Milk Mask
Ingredients:
1/4 cup coconut milk
2 tablespoons aloe vera gel
1 tablespoon honey
Perfect for taming frizz and adding shine. Mix ingredients, apply to hair from mid-length to ends, leave for 20 minutes, then rinse thoroughly.
12. Detoxifying Clay Mask
Ingredients:
2 tablespoons bentonite clay
2 tablespoons apple cider vinegar
1 teaspoon honey
Ideal for oily scalps and removing product buildup. Mix ingredients to form a paste, apply to scalp and hair, leave for 15 minutes, then rinse well.
13. Moisturizing Banana and Avocado Mask
Ingredients:
1/2 ripe banana
1/4 ripe avocado
1 tablespoon coconut oil
This ultra-moisturizing DIY hair mask is perfect for dry, damaged hair. Blend ingredients until smooth, apply to hair, cover with a shower cap, and leave for 30 minutes before rinsing.
14. Volumizing Egg White and Lemon Mask
Ingredients:
2 egg whites
Juice of 1/2 lemon
1 teaspoon coconut oil
Great for fine, limp hair. Whisk ingredients together, apply to roots and length of hair, leave for 20 minutes, then rinse with cool water.
15. Soothing Oatmeal and Milk Mask
Ingredients:
1/4 cup cooked oatmeal
1/4 cup milk
1 tablespoon honey
This gentle mask is perfect for sensitive scalps. Mix ingredients, apply to scalp and hair, massage gently, and leave for 20 minutes before rinsing.
16. Nourishing Shea Butter and Argan Oil Mask
Ingredients:
2 tablespoons shea butter
1 tablespoon argan oil
5 drops lavender essential oil
Ideal for very dry or coarse hair. Melt shea butter, mix with oils, apply to hair, focusing on ends, leave for 30 minutes, then rinse thoroughly.
When using these DIY hair masks, it’s essential to consider your hair type and specific needs. For instance, if you have fine hair, you might want to focus on volumizing masks and avoid heavy oil-based treatments. Conversely, those with thick, coarse hair can benefit from richer, more moisturizing DIY hair masks.
It’s also important to note that while these DIY hair masks can work wonders, they should be used in moderation. Over-conditioning can lead to limp, greasy hair, so aim to use deep conditioning treatments once or twice a week, depending on your hair’s needs.
When applying these DIY hair masks, always start with clean, damp hair. This allows the ingredients to penetrate more effectively. Use a wide-toothed comb to distribute the mask evenly through your hair, paying special attention to the ends, which are often the driest and most damaged parts.
For an extra boost, consider using heat to enhance the effectiveness of your DIY hair masks. After applying the mask, cover your hair with a shower cap or plastic wrap, then wrap a warm towel around your head. The heat will help open up the hair cuticles, allowing the nourishing ingredients to penetrate more deeply.
Remember, patience is key when using DIY hair masks. While you might see some immediate results, such as increased shine or softness, the real benefits come with consistent use over time. Don’t be discouraged if you don’t see dramatic changes after just one application; keep at it, and you’ll soon notice a significant improvement in your hair’s health and appearance.
It’s also worth experimenting with different combinations of ingredients to find what works best for your hair. Everyone’s hair is unique, so what works wonders for one person might not be as effective for another. Feel free to adjust the quantities or swap out ingredients based on your preferences and what your hair responds to best.
Lastly, while these DIY hair masks are generally safe for most people, it’s always a good idea to do a patch test before applying any new mixture to your scalp or hair, especially if you have sensitive skin or are prone to allergies. Apply a small amount of the mask to a small area of your skin and wait 24 hours to ensure there’s no adverse reaction.
By incorporating these DIY hair masks into your regular hair care routine, you’ll be giving your locks the TLC they deserve. Not only will you save money on expensive salon treatments, but you’ll also have the satisfaction of knowing exactly what’s going into your hair care products. So go ahead, get creative in the kitchen, and treat your hair to some homemade goodness!
6. How to Apply DIY Hair Masks for Maximum Benefits
To get the most out of your DIY hair masks, proper application is key. Start by washing your hair with a gentle shampoo to remove any buildup. Towel-dry your hair until it’s damp but not soaking wet. This allows the mask to penetrate more effectively.
When applying your DIY hair masks, section your hair and use your fingers or a wide-toothed comb to distribute the mixture evenly from roots to ends. Pay extra attention to the ends, as they’re often the most damaged. For scalp treatments, gently massage the mask into your scalp using circular motions.
After application, cover your hair with a shower cap or plastic wrap. This helps retain heat and moisture, enhancing the mask’s effectiveness. For an extra boost, wrap a warm towel around your head or use a hair dryer on low heat for a few minutes.
Leave the mask on for the recommended time, usually between 15 and 30 minutes. Rinse thoroughly with lukewarm water, followed by a cool rinse to seal the cuticles. Apply your regular conditioner if needed.
Remember, consistency is key when using DIY hair masks. Incorporate them into your routine once or twice a week for best results.
7. Tips for Storing and Preserving DIY Hair Masks
Proper storage is crucial for maintaining the efficacy of your DIY hair masks. Always prepare fresh masks when possible, but if you have leftovers, store them correctly to prevent spoilage.
For DIY hair masks containing perishable ingredients like fruits or dairy, refrigerate immediately and use within 24-48 hours. Store these in airtight containers to prevent oxidation and bacterial growth.
Oil-based masks can be stored at room temperature in a cool, dark place for up to a week. However, adding a few drops of vitamin E oil can extend their shelf life.
For longer storage, consider freezing your DIY hair masks in ice cube trays. This method works well for most recipes and allows you to thaw only what you need.
Label your containers with the date of preparation and ingredients used. Always check for any signs of spoilage, such as odd smells or discoloration, before use.
8. Common Mistakes to Avoid When Using DIY Hair Masks
While DIY hair masks can be incredibly beneficial, there are some common pitfalls to avoid. One frequent mistake is overusing protein-rich masks, which can lead to protein overload and brittle hair. Balance protein treatments with moisturizing DIY hair masks.
Another error is leaving the mask on for too long. More isn’t always better; stick to the recommended time to prevent over-conditioning, which can make hair limp and greasy.
Using too much heat when applying DIY hair masks can damage your hair. Stick to gentle warmth rather than high heat.
Failing to rinse thoroughly is another common mistake. Residue from DIY hair masks can weigh hair down and attract dirt. Rinse until the water runs clear.
Some people apply masks to dry hair, which can prevent proper absorption. Always apply to damp hair for better penetration.
Lastly, don’t neglect patch tests, especially when trying new ingredients. This helps prevent potential allergic reactions or scalp irritation.
By avoiding these mistakes, you’ll maximize the benefits of your DIY hair masks and achieve healthier, more beautiful hair.
9. Incorporating DIY Hair Masks into Your Hair Care Routine
To reap the full benefits of DIY hair masks, it’s essential to incorporate them into your regular hair care routine. Start by assessing your hair’s needs and choosing a mask that addresses your specific concerns.
For most hair types, using DIY hair masks once or twice a week is sufficient. However, if you have particularly dry or damaged hair, you might benefit from more frequent treatments.
Plan your mask sessions for when you have enough time to let the treatment work its magic. Weekends or evenings are often ideal.
Alternate between different types of DIY hair masks to address various hair concerns. For example, use a moisturizing mask one week and a strengthening mask the next.
Remember to adjust your routine based on your hair’s response. If you notice improvements, maintain your current schedule. If your hair feels weighed down, reduce the frequency of treatments.
10. Conclusion: Embracing the Power of DIY Hair Masks
DIY hair masks offer a natural, cost-effective way to achieve healthier, more beautiful hair. By harnessing the power of natural ingredients, these homemade treatments provide deep conditioning and address a wide range of hair concerns.
From moisturizing avocado masks to strengthening egg treatments, the world of DIY hair masks is diverse and exciting. Experimenting with different recipes allows you to find the perfect combination for your unique hair needs.
Remember, consistency is key when using DIY hair masks. Incorporate them into your regular hair care routine and be patient; the best results often come with time and dedication.
As you embark on your DIY hair mask journey, don’t be afraid to get creative and adjust recipes to suit your preferences. Your hair is unique, and finding the perfect mask might take some trial and error. Embrace the natural goodness of DIY hair masks and watch your hair transform into its healthiest, most radiant self.
Frequently Asked Questions
1.) How do I choose the right DIY hair mask for my hair type?
Ans: To select the best DIY hair mask, consider your hair type and its specific needs. For example, if you have dry or damaged hair, look for masks rich in moisturizing ingredients like honey or coconut oil. If your hair is fine and lacks volume, opt for DIY hair masks or hair care tips through home remedies that include ingredients such as egg whites or lemon to provide lift and texture.
How should I store and preserve my DIY hair masks?
Ans: To prolong the freshness of your DIY hair masks, store them in an airtight container in the refrigerator. Most masks can last up to a week, but it’s essential to check for any signs of spoilage, such as changes in smell or texture, before use. Proper storage is key to maintaining the effectiveness of your hair care with home remedies.
What common mistakes should I avoid when using DIY hair masks?
Ans: When using DIY hair masks, avoid common pitfalls such as using too much product, which can weigh down your hair. Also, ensure you’re applying the mask to clean, damp hair, as overly dirty hair can hinder absorption. Lastly, don’t leave the mask on for longer than recommended, as this may lead to buildup or irritation.
How often should I incorporate DIY hair masks into my hair care routine?
Ans: For most hair types, incorporating a DIY hair mask into your routine once a week is effective. However, if your hair is particularly dry or damaged, consider applying a mask every 3-5 days for enhanced moisture and repair. These hair care tips and home remedies can greatly benefit your hair health.
Can I use leftover DIY hair masks later?
Ans: While it’s best to use freshly made masks for optimal results, you can store leftover DIY hair masks in the refrigerator for a few days. Always check for any changes in smell or texture before using, as this ensures you’re applying the most effective treatment.

7 thoughts on “16 Luxurious DIY Hair Masks for Deep Conditioning and Radiant Locks”